
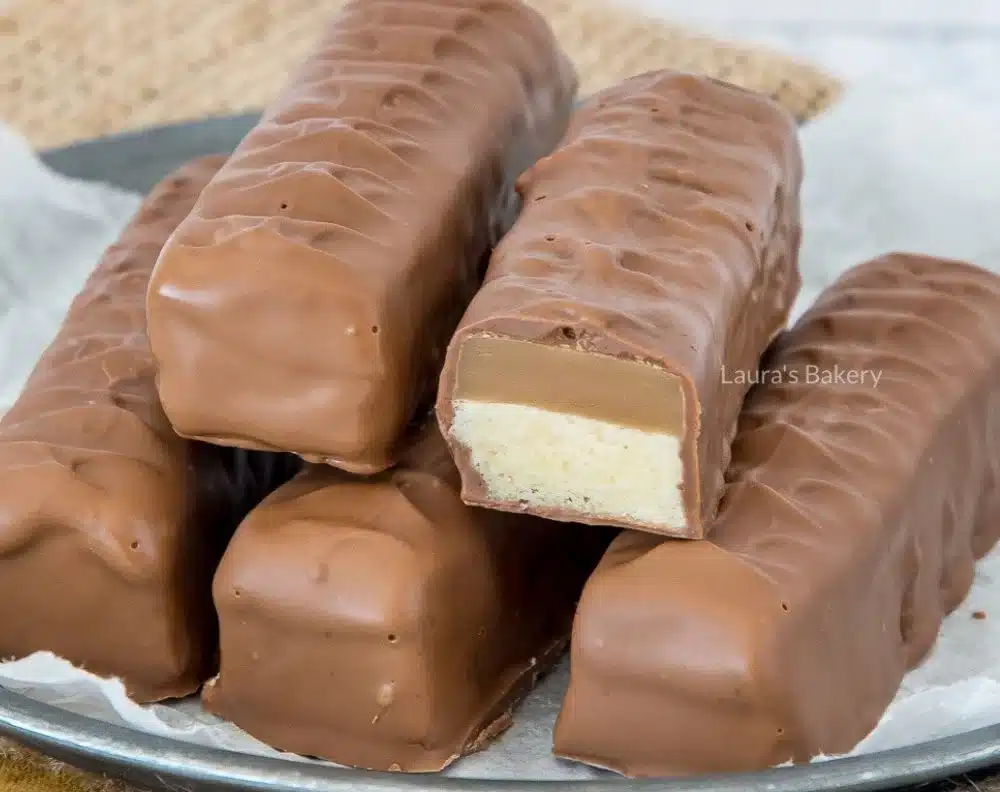
How to make Homemade Twix Bars
Ingredients:
- 80 grams caster sugar
- 160 grams unsalted butter
- 0.5 egg
- 225 grams flour
- 1 pinch salt
- 1 can condensed milk (397 grams)
- 60 grams unsalted butter
- 60 grams dark brown sugar
- 350 grams milk chocolate
Directions:
Cookie base:
- In a bowl, combine the granulated sugar, butter, and egg. Whisk everything together for a few minutes until it turns fluffy.
- Add the flour and the pinch of salt to the mixture. Knead it with a mixer until you have a firm dough.
- Line a baking sheet with baking paper. Firmly press the dough into the bottom of the pan and prick it with a fork to prevent bubbling.
- Bake in a preheated oven at 180˚C (350˚F) for about 25 minutes or until golden brown. Once done, allow the cookie base to cool in the pan.
Caramel layer:
- Once the cookie base is cool, prepare the caramel. Be cautious as the mixture will be very hot! In a saucepan, combine the condensed milk, butter, and dark brown sugar.
- Over low to medium heat, melt the butter and sugar, stirring continuously.
- As the caramel starts to boil, continue stirring. You can lower the heat a bit. The mixture will begin to thicken gradually. Keep stirring until the caramel is about as thick as a soft chocolate spread.
- Pour the caramel over the cooled cookie and spread it evenly using a spatula. Allow it to cool completely in the refrigerator.
Chocolate dipping:
- Melt two-thirds of the milk chocolate in a double boiler. Once melted, remove the bowl from the heat and add the remaining chocolate. Stir until all the chocolate has completely melted.
- When the chocolate is ready, dip each caramel cookie strip into the melted chocolate. Place the dipped bars on a sheet of parchment paper.
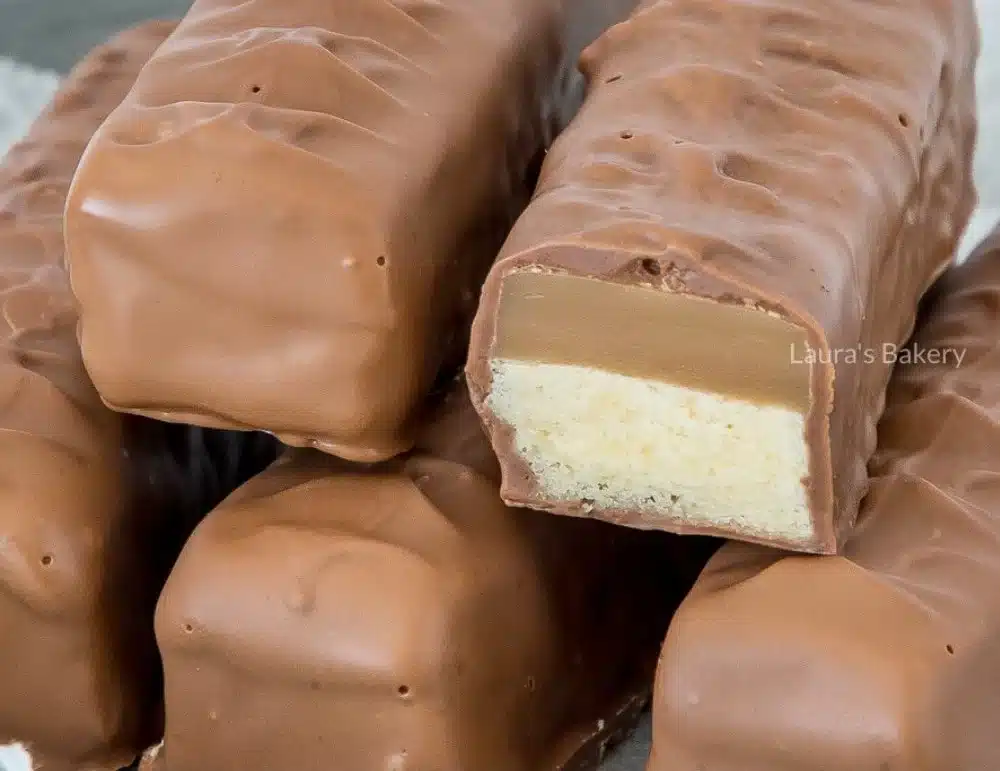
- While the chocolate is still soft, use a fork to press the Twix bars a few times with the flat side. This will create a beautiful pattern on the chocolate layer, just like a store-bought Twix bar.
- Finally, allow the chocolate to harden completely before serving.
Why You’ll Love This Homemade Twix Bars
Homemade Twix bars are a delightful combination of flavors and textures. The crispy cookie base gives way to a gooey, rich caramel layer, all coated in smooth, luscious chocolate. Making these bars at home allows you to enjoy a favorite treat fresh out of your kitchen, and you can modify the ingredients to suit your tastes!
They are perfect for sharing with family and friends, making them a great addition to any gathering. Not only that, but you can also keep these candy bars on hand for a sweet snack whenever you’re craving something delicious.
Nutritional Benefits
Homemade Twix bars do have a few benefits worth noting, even if they are primarily a treat! Here’s a quick look at some of the ingredients:
- Butter provides essential fats that give a rich flavor and texture.
- Sugar helps to provide quick energy. Although it should be consumed in moderation, it can provide an instant boost when you need it most.
- Condensed milk is packed with calcium, offering a good source of this essential mineral.
While these bars are rich and should be enjoyed occasionally, making them yourself allows you to control the quality of ingredients.
What to Serve With Homemade Twix Bars
Homemade Twix bars can be served in various delightful ways:
- Coffee or tea: A warm cup of your favorite beverage pairs perfectly with the sweet, rich flavors of the Twix bars.
- Ice cream: Serve them alongside scoops of vanilla or caramel ice cream for an indulgent treat.
- Milk: A glass of cold milk also complements the crunchy and gooey nature of the bars well.
How to Store Homemade Twix Bars
To keep your Twix bars fresh, follow these easy steps:
- Room Temperature: If you plan to eat them within a few days, store the bars at room temperature in an airtight container to maintain freshness.
- Refrigeration: For longer storage, you can keep them in the refrigerator. They will last up to a week.
- Freezing: If you would like to save them for later, wrapping each bar in parchment paper and placing them in a freezer-safe container will allow you to store them for up to three months.
Tips and Mistakes to Avoid
When making your Homemade Twix bars, here are some tips to ensure the best results:
- Don’t skip the pricking step: Pricking the dough before baking prevents it from puffing up too much.
- Watch the caramel closely: Caramel can burn quickly, so constant stirring is key.
- Let everything cool properly: Allow the cookie base and caramel layer to cool completely before assembling to avoid melting the chocolate.
Variations
If you want to mix things up, consider trying these variations:
- Nutty Twix: Add chopped nuts (like almonds or peanuts) to the chocolate coating or sprinkle them on the caramel layer for an extra crunch.
- Flavored chocolate: Experiment with flavored chocolate melts or add ingredients like cocoa powder to the cookie base for a chocolate version.
- Salted caramel: Sprinkle a bit of sea salt on the caramel layer before adding the chocolate for a delicious sweet and salty combo.
FAQs
1. Can I use different types of chocolate?
Yes! You can use dark chocolate, white chocolate, or even a mix of different chocolate types, depending on your preference.
2. How long do these bars take to make?
The preparation and cooking time is about an hour, not including the cooling time. Allow enough time for the caramel and chocolate to set before serving.
3. Can I make these bars vegan?
Yes! Substitute the butter with a plant-based butter and use non-dairy chocolate. For the caramel, you can try using coconut milk.
Enjoy making your Homemade Twix Bars! They are sure to be a hit with anyone who tries them.
Homemade Twix Bars
Ingredients
For the cookie base
- 80 grams caster sugar Granulated sugar for the cookie base.
- 160 grams unsalted butter Softened butter for the cookie base.
- 0.5 pieces egg Using half an egg, you can whisk and measure.
- 225 grams flour All-purpose flour for the cookie base.
- 1 pinch salt A pinch of salt to enhance flavor.
For the caramel layer
- 397 grams condensed milk One can of condensed milk.
- 60 grams unsalted butter Butter for the caramel layer.
- 60 grams dark brown sugar Brown sugar for caramel flavor.
For the chocolate coating
- 350 grams milk chocolate Milk chocolate for coating the bars.
Instructions
Cookie Base
- In a bowl, combine the granulated sugar, butter, and egg. Whisk everything together for a few minutes until it turns fluffy.
- Add the flour and the pinch of salt to the mixture. Knead it with a mixer until you have a firm dough.
- Line a baking sheet with baking paper. Firmly press the dough into the bottom of the pan and prick it with a fork to prevent bubbling.
- Bake in a preheated oven at 180°C (350°F) for about 25 minutes or until golden brown. Once done, allow the cookie base to cool in the pan.
Caramel Layer
- Once the cookie base is cool, prepare the caramel. In a saucepan, combine the condensed milk, butter, and dark brown sugar.
- Over low to medium heat, melt the butter and sugar, stirring continuously.
- As the caramel starts to boil, continue stirring. Lower the heat a bit. The mixture will begin to thicken gradually.
- Keep stirring until the caramel is about as thick as a soft chocolate spread.
- Pour the caramel over the cooled cookie and spread it evenly using a spatula. Allow it to cool completely in the refrigerator.
Chocolate Dipping
- Melt two-thirds of the milk chocolate in a double boiler.
- Once melted, remove the bowl from the heat and add the remaining chocolate. Stir until all the chocolate has completely melted.
- Dip each caramel cookie strip into the melted chocolate. Place the dipped bars on a sheet of parchment paper.
- While the chocolate is still soft, use a fork to press the Twix bars a few times with the flat side to create a pattern.
- Allow the chocolate to harden completely before serving.